This content is outdated and kept here for reference only!
These installation instructions are outdated and kept here for reference only!
Check the 1.5 installation instructions up to date instructions.
(Open source accounting/ERP application on Ubuntu Oneric Ocelot Ubuntu 11.10)
=============================================================
Update: mai 2012
Note that Template::Latex is included in Template::Plugin::Latex which is now in Debian as
libtemplate-plugin-latex-perl. (It has migrated to Debian Testing ('wheezy') and Ubuntu)
Also for some of the files, need to update the links
Note that libmd5-perl can be downloaded from
http://packages.ubuntu.com/hardy/all/libmd5-perl/download
And that texlive-generic-extra to be downloaded from
http://packages.ubuntu.com/lucid/all/texlive-generic-extra/download
Also the default installation folder is /usr/share/ledgersmb/
Instead of libperl5.12, can perhaps try with libperl5.14
Else download from Ubuntu Lucid repositories
http://packages.ubuntu.com/oneiric/amd64/libperl5.12/download
Update: 09. April 2012 by Nick; address problems, including:
* update package requirements to suit ledgersmb-1.3.14
* remove references to broken links
* remove redundant/duplicate steps
http://permalink.gmane.org/gmane.comp.finance.ledger.smb.user/6100
http://permalink.gmane.org/gmane.comp.finance.ledger.smb.user/5963
=============================================================
by Frans van der Star(f.van.der.star@gmail.com)
Date: 15-11-2011
Used tarbal:ledgersmb-1.3.1.tar.gz
Preliminary Notes
- The installation took place on an “empty” fresh installed basic system Ubuntu 11.10 desktop.
http://www.ubuntu.com/download - The IP-address used is http://127.0.0.1 = localhost
- This tutorial is only for LedgerSMB 1.3.-series
- For the 1.2-versions would like to refer to https://www.howtoforge.com/ledgersmb_debian_etch of which author is Falko Timme.: Installing LedgerSMB (Open Source Accounting Application) on Debian Etch.
- Only with this remark that libmd5-perl is not in the repositories anymore. Hereunder you will find how to download and install this Perl-module.
Thanks to Falko I could explore LedgerSMB in the beginning. I would also like to thank also Chris Travers (ledgersmb.org) who has assisted me a lot.
This instruction is made with the intention that you can copy and paste the commands colored in bold blue in the “terminal” In case of “sudo-commands” your password will be being asked.
The same is for the needed changes in some configuration files; evidently the changes in those files you have to be done manually.
Installation required Perl-modules and required Texlive-modules
sudo apt-get install libdata-dumper-simple-perl perl-modules liblocale-maketext-lexicon-perl libdbi-perl libdbd-pg-perl libconfig-any-perl libmime-lite-perl libhtml-linkextractor-perl libnet-tclink-perl libparse-recdescent-perl libmodule-build-perl libperl5.12 libuuid-perl liblocale-gettext-perl libyaml-tiny-perl libtext-iconv-perl libtext-charwidth-perl libmodule-install-perl liblatex-driver-perl (this is one command)
There are another three modules to be installed, the first two: (SOURCE: Falko Timme)
- libclass-std-perl
- libconfig-std-perl
But they are not in the repositories. First both should be done by downloading from Sourceforge:
cd /tmp
wget https://sourceforge.net/projects/ledger-smb/files/Prerequesites/1.2.x/deb-prereq-1.2.11.tar.gz/download
tar xvfz deb-prereq-1.2.8.tar.gz
cd deb-prereq-1.2
sudo dpkg -i libclass-std-perl_0.0.8-1_all.deb libconfig-std-perl_0.0.4-1_all.deb
In connection with the above mentioned installed Perl-modules a few texlive modules should be installed also. Would like to emphasize if those are not installed Perl will not work with the LedgerSMB!!!
sudo apt-get install texlive-fonts-extra texlive-latex-extra-doc texlive-lang-all texlive-latex-extra texlive-fonts-recommended texlive texlive-doc-en
This could take long time (700MB)!!!
Unfortunately one needed Texlive-module is not in the repositories:
-texlive-generetic-extra
This is going to be downloaded from Ubuntu:
http://packages.ubuntu.com/lucid/texlive-generic-extra
Just copy and paste this in your browser in order to enter this website. Under the page you will see this:”Download texlive-generic-extra” and go to all” under “architecture” then choose a “site” (a lot) for download and choose save.
In order to install this do the following:
cd ~/Downloads
sudo dpkg -i texlive-generic-extra_2009-7ubuntu3_all.deb
Installation Apache
sudo apt-get install apache2 apache2-doc apache2-mpm-prefork apache2-utils libexpat1 ssl-cert build-essential
Installation LedgerSMB-1.3
As stated before this tutorial is only for the LedgerSMB-1.3-series. For the 1.2-series would like to refer to my preliminary notes in 1. For the most actual version please consult: http://sourceforge.net/projects/ledger-smb/files/ledgersmb/
cd /tmp
wget http://switch.dl.sourceforge.net/sourceforge/ledger-smb/ledgersmb-1.3.1.tar.gz
(At the moment, 19-10-2011, most recent version)
tar xvfz ledgersmb-1.3.1.tar.gz
sudo mv ledgersmb /usr/local/
Configuring Apache for LedgerSMB 1.3
In order to get full access to Apache:
sudo chown -R www-data:www-data /usr/local/ledgersmb
>In order Apache-server to work it should be connected with the appropriate config-files:
sudo sed -e "s|WORKING_DIR|$PWD|g" /usr/local/ledgersmb/ledgersmb-httpd.conf.template > /etc/apache2/conf.d/ledgersmb-httpd.conf
Enable mod_rewrite:
sudo a2enmod rewrite
Restart of Apache is needed:
sudo /etc/init.d/apache2 restart
Some modifications of the configuration-files are needed:
sudo mv /usr/local/ledgersmb/ledgersmb.conf.default /usr/local/ledgersmb/ledgersmb.conf
Restart of Apache is needed:
sudo /etc/init.d/apache2 restart
Validating the Installation
cd /usr/local/ledgersmb
sudo perl Makefile.PL
sudo make
This can take a long time.
Before we make test we have to install the Latex Perl Module; otherwise test will fail:
sudo cpan Template::Latex
This can take long timE and at the end you will see PASS.
sudo make test
During the three processes three questions will be asked. Just hit Enter!
Installation of the Perl-files LedgerSMB put on Apache
cd /usr/local/ledgersmb
sudo sh install.sh
During this process similar as the previous ones three questions will be asked. Just hit Enter!
At the end you will be asked two questions:
- Which user does your web server run as? Type www-data (no space!!
- Where do we copy the ledgersmb-httpd.conf.template file to? Type this:/etc/apache2/conf.d
(no space!!)Installation and configuration Posgresql
sudo apt-get install postgresql-8.4 postgresql-client-8.4 postgresql-contrib-8.4 libaprutil1-dbd-pgsql
sudo su postgres -c psql template1
postgres=# ALTER USER postgres WITH PASSWORD ‘postgres’;Please substitute 'postgres' with a password of your choice. If you are concerned about conflicts with other packages (for example, OpenBravo), please review the documentation for those packages.
postgres=# \q in order to leave psql
That alters the password for within the database, now we need to do the same for the unix user ‘postgres'
sudo passwd -d postgres
Now we create ledgersmb database who has full rights on the database with user ledgersmb:
sudo adduser ledgersmb
sudo -u postgres createuser -D -A -P ledgersmb
sudo -u postgres createdb -O ledgersmb ledgersmbsudo gedit /usr/local/ledgersmb/ledgersmb.conf
change line 79 “/usr/share/pgsql/contrib” into /usr/share/postgresql/8.4/contribsudo /etc/init.d/postgresql restart
Before going into LedgerSMB restart of system is needed.
After restart we can do the setup of LedgerSMB, which can be found on the next pages.
Setup LedgerSMB
You go to you web-browser and type: localhost/ledgersmb/setup.pl (see screen hereunder)
For the password you type give the password you gave above when you set the database user's password in the database ('postgres' was the example password given).
For the database (=database of the organization) you can choose the company by yourself: type name of Company/Organization, in this example mycompanyClick on “login”

Then you will come to this page:
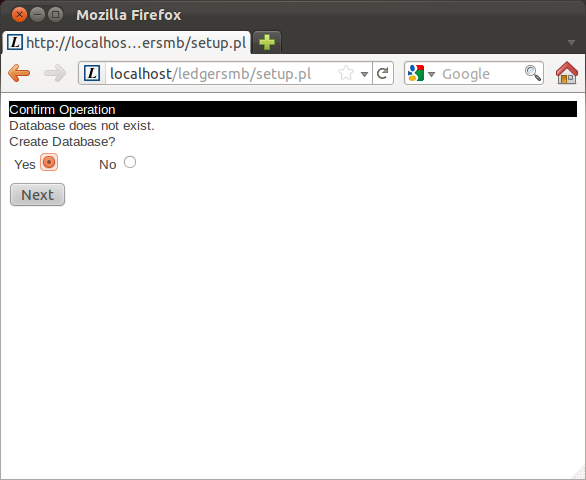
Choose yes and click on nextThen you are directed to the following page (This could take several minutes because the database for the company will be made)
Choose language from scroll down menu us
Then next
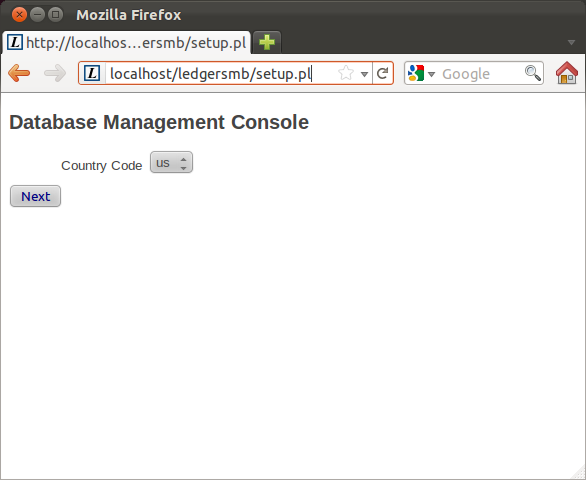
We arriving at the next page
There is a scroll-down menu. But default General.sql is best option to see all features. then we press next
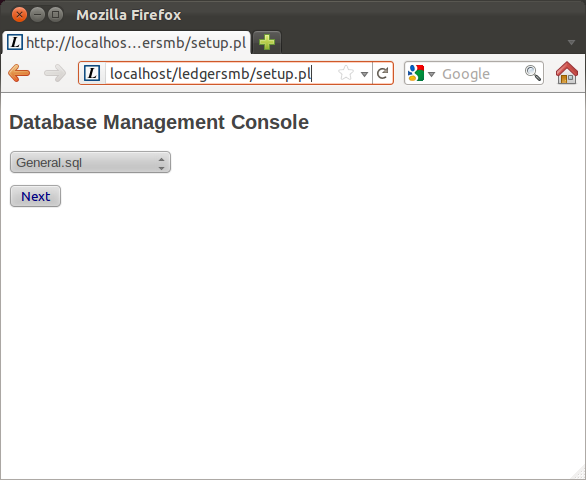
At last we arrive at the second last page before we can login
Here you fill in the data needed according to your choice:
Import: no
Assign permission: choose full permissions
Then press: create user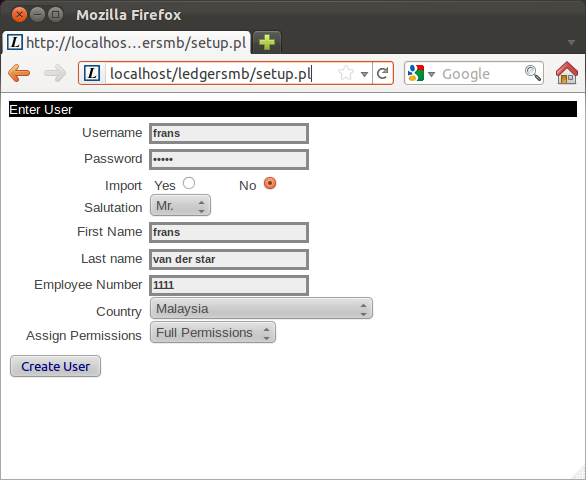
Attention: Now administrator with full permissions has been created!!At last we enter the last screen before we arrive at the login-screen.
Now we choose Start Using LedgerSMB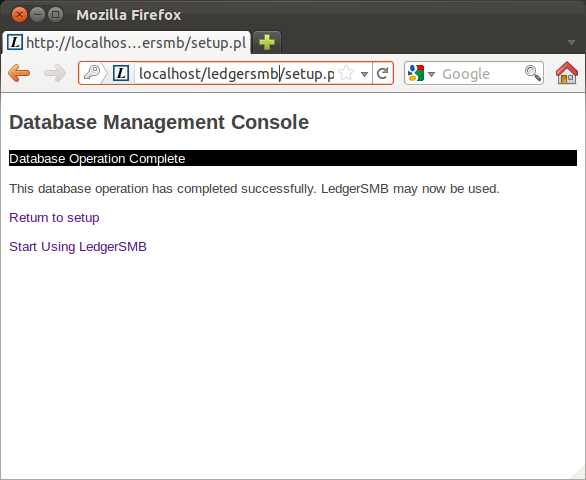
Now we enter the Login screen of LedgerSMB
Fill here in the data you already have inserted according to the previous pages.
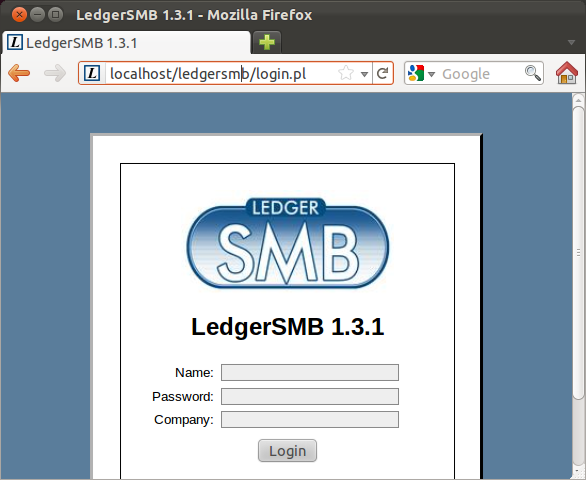
The next time you go to login of LedgerSMB: You type in browser: localhost/ledgersmb/login.pl
After we press login we arrive on this page.
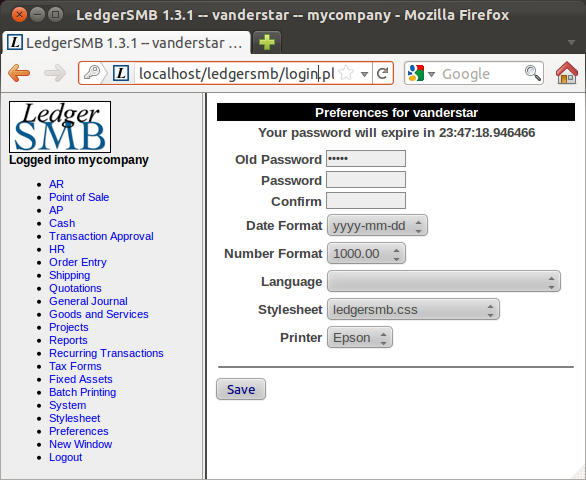
As stated you should change your password. Also you can modify your preferences in the listed formats.
Important: A major difference between 1.3- and 1.2-series is the creation of users and their authorizations. Here you simply go to “System” and then to “admin users”.
Wish you a lot of pleasure